 English
 Deutsch
 Español
ABS plastic bidet shattaf
Item No.: SR-101 Material: PP/ABS OEM: Acceptable Color: Chrome/white/other colors... ...

Item No.: SR-101 Material: PP/ABS OEM: Acceptable Color: Chrome/white/other colors... ...
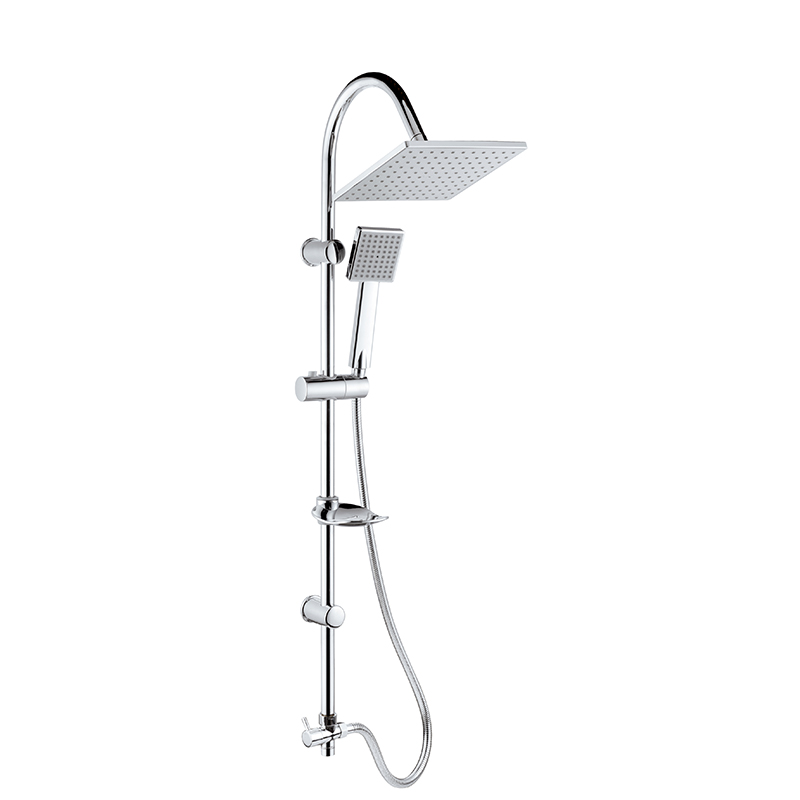
.jpg?imageView2/2/w/500/h/500/format/jpg/q/100 "Bathroom shower accessories")
Item No.: SR-102 Material: PP/ABS OEM: Acceptable Color: Chrome/white/other colors... ...
.jpg?imageView2/2/w/500/h/500/format/jpg/q/100 "Bathroom chrome portable shattaf bidet")
Item No.: SR-109 Material: PP/ABS OEM: Acceptable Color: Chrome/white/other colors... ...

Item No.: SR-106 Material: PP/ABS OEM: Acceptable Color: Chrome/white/other colors... ...

Item No.: SR-114 Material: PP/ABS OEM: Acceptable Color: Chrome/white/other colors... ...

Item No.: SR-118 Material: PP/ABS OEM: Acceptable Color: Chrome/white/other colors... ...

Item No.: SR-123-D Material: PP/ABS OEM: Acceptable Color: Chrome/white/other colors... ...

Item No.: SR-128 Material: PP/ABS OEM: Acceptable Color: Chrome/white/other colors... ...

Item No.: SR-148 Material: PP/ABS OEM: Acceptable Color: Chrome/white/other colors... ...

Item No.: SR-149 Material: PP/ABS OEM: Acceptable Color: Chrome/white/other colors... ...

Item No.: SR-161 Material: PP/ABS OEM: Acceptable Color: Chrome/white/other colors... ...

Item No.: SR-168 Material: PP/ABS OEM: Acceptable Color: Chrome/white/other colors... ...
Ningbo SiErWo Sanitary Ware Co., Ltd. was founded in 2007, As a professional OEM Flexible Hoses Factory, Is to provide high-end sanitary products R & D, production, sales and service of professional brands.
For the latest in SEW innovations, promotions, and more.
Copyright © Ningbo SiErWo Sanitary Ware Co., Ltd. All Rights Reserved
